What It Actually Feels Like to Get Veneers (And What to Expect)
How veneers are applied is one of the most common questions patients ask before committing to a smile makeover — and for good reason. It’s a permanent change, so you want to know exactly what you’re signing up for.
Here’s the short answer:
- Consultation — Your dentist evaluates your teeth, discusses your goals, and designs your new smile.
- Tooth preparation — A thin layer of enamel (0.3–0.7 mm) is gently removed from the front of each tooth.
- Impressions — Digital scans or physical molds are taken and sent to a dental lab.
- Temporary veneers — Custom-fit temporaries protect your teeth while the permanent veneers are made (usually 1–2 weeks).
- Bonding appointment — Your dentist checks the fit, etches the tooth surface, applies dental cement, and cures it with a UV light.
- Final adjustments — Bite is checked, edges are polished, and you leave with your finished smile.
The whole process typically spans two appointments over 2–3 weeks.
Most patients are surprised by how comfortable it is. Local anesthetic keeps the prep appointment pain-free, and any sensitivity afterward usually fades within a few days.
I’m Dr. Loren Grossman, a cosmetic and family dentist serving Northeastern Pennsylvania since 1984, and I’ve guided hundreds of patients through exactly how veneers are applied — from the first consultation to the final polish. If you’re considering this treatment, here’s everything you need to know before you sit in the chair.

How are veneers applied glossary:
Understanding the Options: Traditional, No-Prep, and Composite Veneers
Before diving into the steps of the procedure, it is important to understand that “veneers” are not a one-size-fits-all treatment. Depending on your aesthetic goals, your budget, and the current state of your natural teeth, we may recommend one of three primary types of veneers.
To help you navigate your choices, you can read more info about different veneer types to see which aligns best with your dream smile.
Porcelain Veneers
Porcelain veneers are the gold standard in cosmetic dentistry. Crafted from high-grade, durable ceramic, these wafer-thin shells are custom-designed to match the natural translucency and light-reflecting properties of real tooth enamel. Porcelain is highly stain-resistant, meaning your morning cup of coffee or evening glass of red wine won’t dull your new smile. With proper care, they are incredibly long-lasting.
Composite Resin Veneers
Composite veneers use a tooth-colored composite resin—the same material used for dental bonding—applied directly to the teeth. They can often be sculpted and polished in a single visit. While they are more affordable and require less initial tooth preparation, they are more prone to chipping and staining over time. They generally last about 5 to 7 years and cost around $400 to $2,000 per tooth.
No-Prep Laminates
For patients looking to keep their natural tooth structure fully intact, no-prep veneers (such as Lumineers) are an appealing alternative. These ultra-thin laminates are only about 0.2 to 0.3 mm thick—similar to a contact lens. Because they require little to no enamel removal, the process is often reversible. However, they are not suitable for everyone; they work best for minor cosmetic adjustments, such as closing small gaps or correcting slightly recessed teeth.
To help you visualize how these options compare, here is a breakdown of their key features:
| Feature | Traditional Porcelain | Composite Resin | No-Prep Laminates |
|---|---|---|---|
| Material | High-grade dental ceramic | Composite polymer resin | Ultra-thin porcelain |
| Enamel Shaving | 0.3 to 0.7 mm | Minimal to none | 0.2 to 0.3 mm (or none) |
| Average Lifespan | 10 to 15+ years | 5 to 7 years | 5 to 10 years |
| Stain Resistance | Excellent | Moderate (can discolor) | Excellent |
| Reversibility | No (Irreversible) | Yes (usually) | Yes |
| Primary Benefit | Maximum durability & realism | Lower cost & faster treatment | Preserves natural enamel |
To explore how these treatments fit into a complete smile makeover, check out our Transform Your Smile with Dental Veneers: A Comprehensive Guide.
How Are Veneers Applied? The Step-by-Step Clinical Process
Transforming your smile is a collaborative process that blends advanced dental science with artistic design. When you visit our Kingston, PA office, we break the journey down into clear, manageable steps so you always know what to expect.
The Initial Consultation & Smile Design
Every great smile starts with a conversation. During your first consultation, we discuss what you want to improve—whether it is masking deep stains, closing gaps, or straightening slightly crooked teeth. We evaluate your overall oral health, ensuring your gums are healthy and your teeth are free of decay before beginning any cosmetic work.
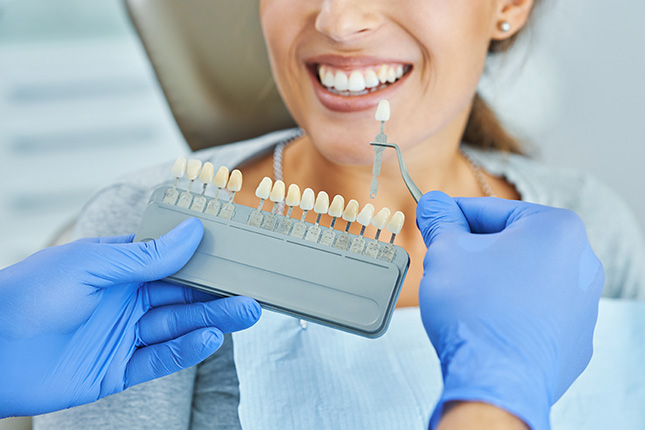
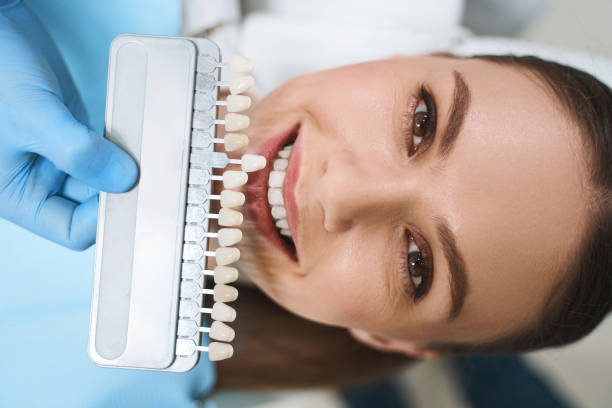
Using Digital Smile Design technology, we can map out your facial symmetry, lip line, and tooth proportions. This allows you to preview your expected results before we ever touch a tooth. We also perform precise shade matching. A key clinical trick we use is waiting at least five minutes after your teeth have rehydrated before selecting a shade, as dry teeth appear artificially white and can throw off the color match.

To learn more about the advanced clinical steps we take to ensure your veneers fit flawlessly, you can review the official Veneer Installation Protocol. For a broader overview of starting your cosmetic journey, read How to Understand a Dental Veneers Procedure Starting from Scratch or explore our Dental Veneers Procedure: A Detailed Guide.
Step 1: Preparation and Enamel Shaving
Once your custom smile plan is approved, we schedule your preparation appointment. This is the step that makes many patients nervous, but it is highly controlled and conservative.
To make room for the veneer so it does not look bulky or fake, we gently shave away a microscopic layer of enamel from the front and biting edges of the teeth. For traditional porcelain veneers, this involves removing just 0.3 to 0.7 mm of enamel—which is about the thickness of a fingernail or a credit card.
A 2024 survey found that 62% of patients worry about enamel removal when considering veneers. We completely understand this concern. However, keeping the preparation limited to the enamel layer is actually the secret to the procedure’s success. Veneers have an incredible 99% success rate when they are bonded directly to enamel rather than the deeper dentin layer.
To ensure you do not feel a thing, we use local anesthesia to numb the area. We use specialized guide burs to ensure we only remove the exact amount of enamel required, keeping the process as conservative as possible.
If you are curious about the exact measurements and why this step is so important, read more info about enamel removal.
Step 2: Impressions and Temporary Veneers
With the teeth prepared, we need to capture a perfect model of your mouth to send to our world-class dental laboratory.
Instead of the messy, uncomfortable putty impressions of the past, we utilize state-of-the-art digital intraoral scanners. These digital scans are incredibly precise, achieving microscopic marginal gaps of under 25 micrometers (compared to the 50 to 100 micrometer variations seen with traditional molds). This precision ensures your veneers sit flush against your gums, preventing plaque buildup and future decay.
Because your custom porcelain veneers take about 1 to 2 weeks to be fabricated by the master ceramist, we place acrylic temporary veneers on your prepared teeth.
These temporaries serve three vital purposes:
- Protection: They shield your newly prepared, exposed enamel from hot and cold temperatures.
- Aesthetics: They keep your smile looking complete and natural while you wait.
- The “Test Drive”: They let you preview the shape, length, and bite of your new teeth. You can practice speaking and chewing with them, giving us valuable feedback to make any final tweaks to your permanent restorations.
To get a better sense of what to expect during this transitional phase, read more info about the veneer process.
Step 3: How Are Veneers Applied and Bonded to the Teeth?
When your permanent custom veneers arrive from the lab, you will return to our office for the exciting bonding appointment. This is where the magic happens.
First, we gently remove your temporary veneers and thoroughly clean your teeth. We place the permanent veneers on your teeth using a temporary try-in paste. This allows you to look in the mirror and approve the final color, shape, and fit before they are permanently cemented.
Once you give us the green light, we prepare the teeth for permanent bonding:
- Isolation: We isolate the teeth using a rubber dam. This is a critical step; keeping the area completely dry is essential for a strong bond. Using a rubber dam during veneer bonding can boost retention by 35% and helps avoid the 4% to 7% debonding rate associated with poor moisture control.
- Etching: We apply a mild acid etching gel to the enamel for 15 to 20 seconds. This creates microscopic rough areas on the tooth’s surface, allowing the adhesive to grip tightly.
- Cementation: We apply a specialized, shade-matched dental resin cement to the back of the veneer and place it onto your tooth with a precise pressure of 100 to 150 Newtons.
- Curing: We shine a specialized blue LED curing light (wavelength of 440–480 nanometers) onto the veneer for approximately 60 seconds. This light activates the catalysts in the cement, hardening it instantly into a rock-solid bond.

To read a highly detailed breakdown of this chemistry and the step-by-step bonding process, you can refer to The porcelain veneers procedure- A guide to the steps of the process..
Veneers vs. Dental Crowns: What is the Difference?
Patients often ask us whether they need a veneer or a dental crown. While both can dramatically improve the appearance of your teeth, they serve very different clinical purposes.
The primary difference lies in how much of the tooth they cover and protect:
- Dental Veneers are purely cosmetic. They are ultra-thin shells that cover only the front surface of the tooth. They require very conservative tooth preparation (removing about 0.5 mm of enamel) and are designed for healthy teeth that have minor cosmetic flaws like staining, small chips, or gaps.
- Dental Crowns (often called caps) cover the entire tooth structure down to the gum line. They are restorative treatments used to rebuild teeth that are severely decayed, cracked, broken, or have undergone root canal therapy. Because they must structurally support and protect a damaged tooth, they require more extensive preparation, usually removing about 1.5 to 2.0 mm of enamel.
For a comprehensive medical overview of these differences and how to decide which treatment is right for your oral health, check out the Cleveland Clinic Veneer Guide.
Longevity, Aftercare, and Potential Risks
Once your permanent veneers are bonded, they are designed to be highly durable. Porcelain veneers typically last 10 to 15 years with proper care, and clinical research suggests they can last up to 20 years. However, their lifespan depends heavily on how you care for them.
Without proper initial care, early debonding can occur in 15% to 20% of veneer cases. To protect your investment, we recommend following these essential aftercare tips:
- Practice Excellent Oral Hygiene: Brush twice daily with a non-abrasive fluoride toothpaste and a soft-bristled toothbrush. Floss daily to keep your gums healthy and prevent decay on the natural tooth structure behind the veneer.
- Avoid Using Your Teeth as Tools: Never use your teeth to rip open packaging, bite your fingernails, or chew on hard objects like ice or pens.
- Mind Your Diet: While porcelain is highly stain-resistant, the underlying cement can sometimes discolor if exposed to excessive staining agents. Cut hard foods like whole apples or raw carrots into bite-sized pieces and chew them with your back teeth.
- Wear a Night Guard: If you grind or clench your teeth at night (bruxism), a custom-fabricated night guard is essential. Wearing a night guard can reduce your veneer fracture risk by 60% to 75%.
If you want to read more about protecting your smile and avoiding common pitfalls, review more info about veneer risks. To learn more about designing and maintaining your dream smile, check out Perfect Smile Veneers: Achieve the Smile of Your Dreams and Get Your Perfect Smile: Understanding the Basics of Veneers.
Frequently Asked Questions About How Veneers Are Applied
Is the procedure painful, and do I need anesthesia?
The veneer preparation and bonding procedures are highly comfortable. We use local anesthesia to completely numb your teeth and gums during the enamel-shaving process, meaning you should not feel any pain. After the numbing wears off, you may experience mild, temporary sensitivity to hot or cold foods, especially while wearing your temporary veneers. This is completely normal and typically resolves within a few days of receiving your permanent veneers.
How are veneers applied if I want to avoid shaving my natural teeth?
If you want to avoid altering your natural teeth, we can explore no-prep or minimal-prep veneers. These ultra-thin porcelain laminates are applied directly to your existing enamel without the need for extensive drilling. However, this option is only suitable for patients with minor cosmetic concerns, such as small gaps or teeth that sit slightly backward in the arch. A comprehensive evaluation of your bite and alignment is required to see if you are a candidate.
How much do veneers cost, and does insurance cover them?
According to the American Dental Association (ADA), the average cost of veneers ranges from $925 to $2,500 per tooth, depending on the material used and the complexity of the case. Because veneers are classified as a cosmetic procedure, they are generally not covered by dental insurance. However, we offer flexible financing options and payment plans in our Kingston, PA office to help make your dream smile highly accessible.
Conclusion
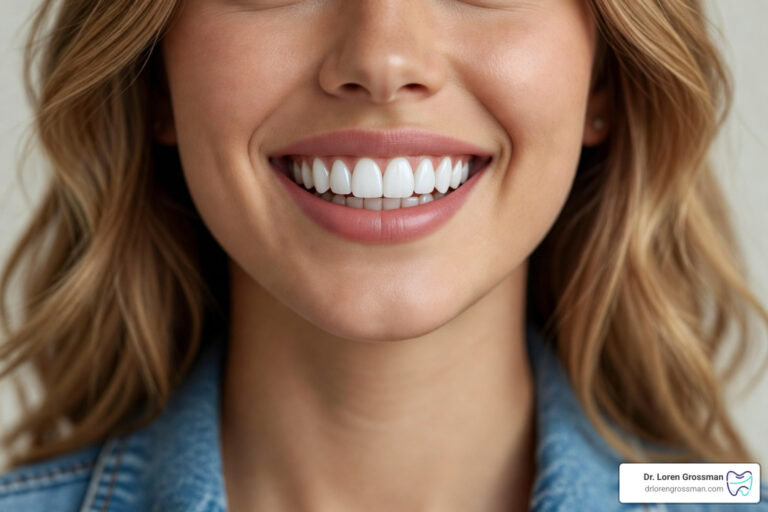
Getting dental veneers is a life-changing journey that can instantly restore your self-esteem and give you a radiant, healthy-looking smile. Understanding how veneers are applied is the first step toward making an informed decision about your dental health.
At the office of Dr. Loren Grossman, we provide top-tier cosmetic and general dentistry in Northeastern Pennsylvania. Combining decades of clinical expertise with advanced digital technology and a warm, patient-first approach, we are dedicated to delivering exceptional smile transformations that look completely natural.
Are you ready to take the first step toward the smile you have always wanted? Schedule a dental veneers consultation with our friendly team in Kingston, PA today!